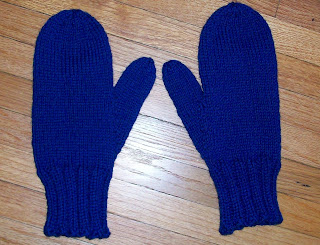
Caring for your mittens
Hand wash mittens in cool water with gentle wool wash. Do not rub or wring. Squeeze out excess water, then spin in washing machine or roll in towels to remove rest of water. Lay garment flat to dry out of direct sunlight and shape to original measurements.
Knitting Tips
Fair Isle mittens are funtional as well as warm, and beautiful.
Try using wooden needles instead of metal. Wooden needles are less slipery, the wooden needles will grip your stitches better.
You can bind off Fair Isle mittens with a 3 needle bind off from the inside.
The easiest way to knit Fair Isle mittens is to use 4 needles, and devide your stitches evenly onto 4 needles.
Using 5 DPN's will help to avoid ladders.
When choosing colors for your mittens, make sure that there's enough contrast between the background colors and the pattern color so the pattern doesn't get lost.
Carry the strands of unused color loosely in the back of the project.
If you carry the yarn, that is not in use to tightly, you will have puckers.
Loose stitches can be tightened, but it is almost impossible to loosen stitches that are to tight, and they will cause puckering on the right side of your project, and may even affect the fit.
To help you keep your place on the chart, use a magnetic board or a piece of sticky note paper to mark the row you're working, This makes it easier to follow the chart. You can move it up as you finish each row. The reason for placing the marker above the row you are working on, is so that you can see how it fits with with what you have already knit.
You can also make a working copy of your chart and inlarge it, so you can make your own personal notes on the pattern, this will alo help you follow along better.
The key to organizing your yarn, is to keep one ball on your right side, and the other color on your left side. You should hold the main color in which ever hand you feel the most comfortable.
Putting your ball of yarn in a bowl, so that it can roll around in the bowl, may prevent twisting of your yarn.
I like to use a ribbed cuff on my mittens, because the rib is more snug, and very elastic. Your ribbing can be shortened or lengthened, to make the mitten perfect for you.
If your mitten does not fit perfectly, washing and blocking the mitten can change the size. I always block my wool Folk mittens.
Felted wool is warmer, and more water repellent.
Kitchener Stitch
I use the Kitchener Stitch to graft the lives stitches together in my Folk Mitten Patterns.
Using the Kitchener Stitch, you will be able to seam the live stitches together invisibly.
You need to make sure that the two pieces you are grafting together have the same number of stitches. Then you will
create a row of stitches with your sewing needle.
1) Draw your yarn through the very first stitch on the front needle as if to purl, and leave it on the needle.
2) Draw your yarn through the first stitch on the back needle as if to knit, and leave it on the needle.
These first 2 steps are only done once.
3) Pull the yarn through the first stitch on the front needle, as if to knit, and slip it off of the end of the needle.
4) Pull the yarn through the next stitch on the front needle as if to purl and leave the stitch on the needle.
5) Pull the yarn through the first stitch on the back needle as if to purl, and slip it off of the needle.
6) Pull the yarn through the second stitch on the back needle as if to knit, and leave this stitch on the needle.
Repeat rows 3 through 6 until you have all of your stitches grafted together. Then weave in your yarn ends on the inside of your mitten.
Just remember Knit, Purl, Purl, Knit while grafting the stitches on your mitten, and you will have a beautifully finished mitten.
Blocking Folk Mittens
Either water or steam is used in the blocking process. Once your mitten is completed, the blocking is done. Blocking will help adjust, and reshape both the length and width of your mitten. Both of your mittens should be identical. Blocking will ensure proper size and fit of your mitten.
Your mitten can be dunked in cool water until completely saturated before shaping. Steam can also be used by pinning the mitten to the correct measurements, then using a steam iron held above the mitten to steam it into shape. Don't let the iron touch your mitten because the natural fibers can be scorched, and man made fibers will be ruined.
Which ever method you decide to use, it is important that the mitten should dry completely.
After blocking your mitten it should still have texture, and life. It should not be blocked to the point where the stitches are lifeless and flat.